1、可以通过自定义object对象的数据集对象,然后使用GeneratorDataset进行封装,接下来将以自定义cifar10数据集来简单展示使用GeneratorDataset接口的方法。
2、自定义cifar10数据集
分析格式
在定义数据集之前,我们首先要做的就是数据集的格式分析。在cifar官网中,我们可以得知数据集的基本格式,还可以通过已有的博客,查看读取cifar10的代码样例。
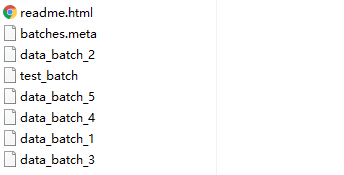
如下图所示是cifar-10-batches-py数据集的目录文件,这里我们主要是关注data_batch和test_batch。
3、加载数据
这里我主要以torchvision中的cifar10数据加载为例,说明构建cifar10数据集的方法。
train_list = [
['data_batch_1', 'c99cafc152244af753f735de768cd75f'],
['data_batch_2', 'd4bba439e000b95fd0a9bffe97cbabec'],
['data_batch_3', '54ebc095f3ab1f0389bbae665268c751'],
['data_batch_4', '634d18415352ddfa80567beed471001a'],
['data_batch_5', '482c414d41f54cd18b22e5b47cb7c3cb'],
]
test_list = [
['test_batch', '40351d587109b95175f43aff81a1287e'],
]
...
if self.train:
downloaded_list = self.train_list
else:
downloaded_list = self.test_list
...
for file_name, checksum in downloaded_list:
file_path = os.path.join(self.root, self.base_folder, file_name)
with open(file_path, 'rb') as f:
entry = pickle.load(f, encoding='latin1')
self.data.append(entry['data'])
if 'labels' in entry:
self.targets.extend(entry['labels'])
else:
self.targets.extend(entry['fine_labels'])
"""可以很容易理解到,数据集文件里面有一个"data"和一个"label"键,分别拿出来就好"""
self.data = np.vstack(self.data).reshape(-1, 3, 32, 32)
self.data = self.data.transpose((0, 2, 3, 1)) # convert to HWC
4、构建cifar10数据集并且完成预处理
由于cifar10读取进来以后已经是数据形式,因此并不需要想用的图像解码,可以直接使用opencv或者PIL进行处理。这里以cifar10的test数据为例。
import os
import pickle
import numpy as np
import mindspore
from mindspore.dataset import GeneratorDataset
class CIFAR10(object):
train_list = [
'data_batch_1',
'data_batch_2',
'data_batch_3',
'data_batch_4',
'data_batch_5',
]
test_list = [
'test_batch',
]
def __init__(self, root, train, transform=None, target_transform=None):
super(CIFAR10, self).__init__()
self.root = root
self.train = train # training set or test set
if self.train:
downloaded_list = self.train_list
else:
downloaded_list = self.test_list
self.data = []
self.targets = []
self.transform = transform
self.target_transform = target_transform
# now load the picked numpy arrays
for file_name in downloaded_list:
file_path = os.path.join(self.root, file_name)
with open(file_path, 'rb') as f:
entry = pickle.load(f, encoding='latin1')
self.data.append(entry['data'])
if 'labels' in entry:
self.targets.extend(entry['labels'])
else:
self.targets.extend(entry['fine_labels'])
self.data = np.vstack(self.data).reshape(-1, 3, 32, 32)
self.data = self.data.transpose((0, 2, 3, 1)) # convert to HWC
def __getitem__(self, index):
"""
Args:
index (int): Index
Returns:
tuple: (image, target) where target is index of the target class.
"""
img, target = self.data[index], self.targets[index]
# doing this so that it is consistent with all other datasets
# to return a PIL Image
img = Image.fromarray(img)
if self.transform is not None:
img = self.transform(img)
if self.target_transform is not None:
target = self.target_transform(target)
return img, target
def __len__(self):
return len(self.data)
cifar10_test = CIFAR10(root="./cifar10/cifar-10-batches-py", train=False)
cifar10_test = GeneratorDataset(source=cifar10_test, column_names=["image", "label"])
cifar10_test = cifar10_test.batch(128)
for data in cifar10_test.create_dict_iterator():
print(data["image"].shape, data["label"].shape)
(128, 32, 32, 3) (128,)
(128, 32, 32, 3) (128,)
(128, 32, 32, 3) (128,)
(128, 32, 32, 3) (128,)
5、可以从上面的代码看到,虽然语言风格不同,但是MIndSpore使用GeneratorDataset依然可以为我们提供一套相对便利的数据集加载方式。对于数据集的预处理的transform代码,研究者可以将代码直接通过transform参数传入get_item函数,十分方便;同时也可以使用mindspore语言风格,通过dataset自带的map函数,对数据集进行预处理,不过前者的语言风格更加python,推荐使用。